JOURNAL / INSTALLATION AND CARE
How to Mount Framed Sisal Scratchers and Mats: A Buyer’s Guide
Treat mounting as part of the product
Wall construction, complete product weight, rear assembly and scratching forces all influence the mounting choice.
TerraFaser’s frame pairing catalog presents paired aluminum brackets, concealed keyhole plates and 3M Command picture-hanging strips. Validate the selected system for the finished scratcher; picture-hanging assumptions do not automatically apply. A wall scratcher is not a climbing step or resting platform unless designed and validated for that use.
Compare the three catalog mounting options
| Mounting concept | Connection | Confirm before specifying |
| Paired aluminum brackets | Frame bracket engages with wall bracket | Frame screw retention, wall-compatible fixings, full engagement |
| Concealed keyhole plates | Rear plates locate over wall screw heads | Plate spacing, screw-head fit, resistance to unintended lifting |
| Picture-hanging strips | Matching adhesive strips join a frame to a suitable surface | Exact product, approved surfaces, application method, intended use |
Hardware illustrations are configuration references. Final fixings, quantities and instructions must match the frame, wall and mounting product.
Option 01: Paired aluminum brackets
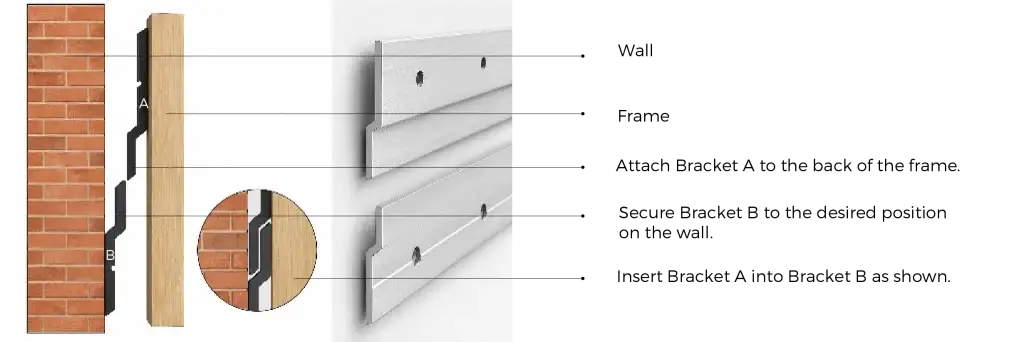
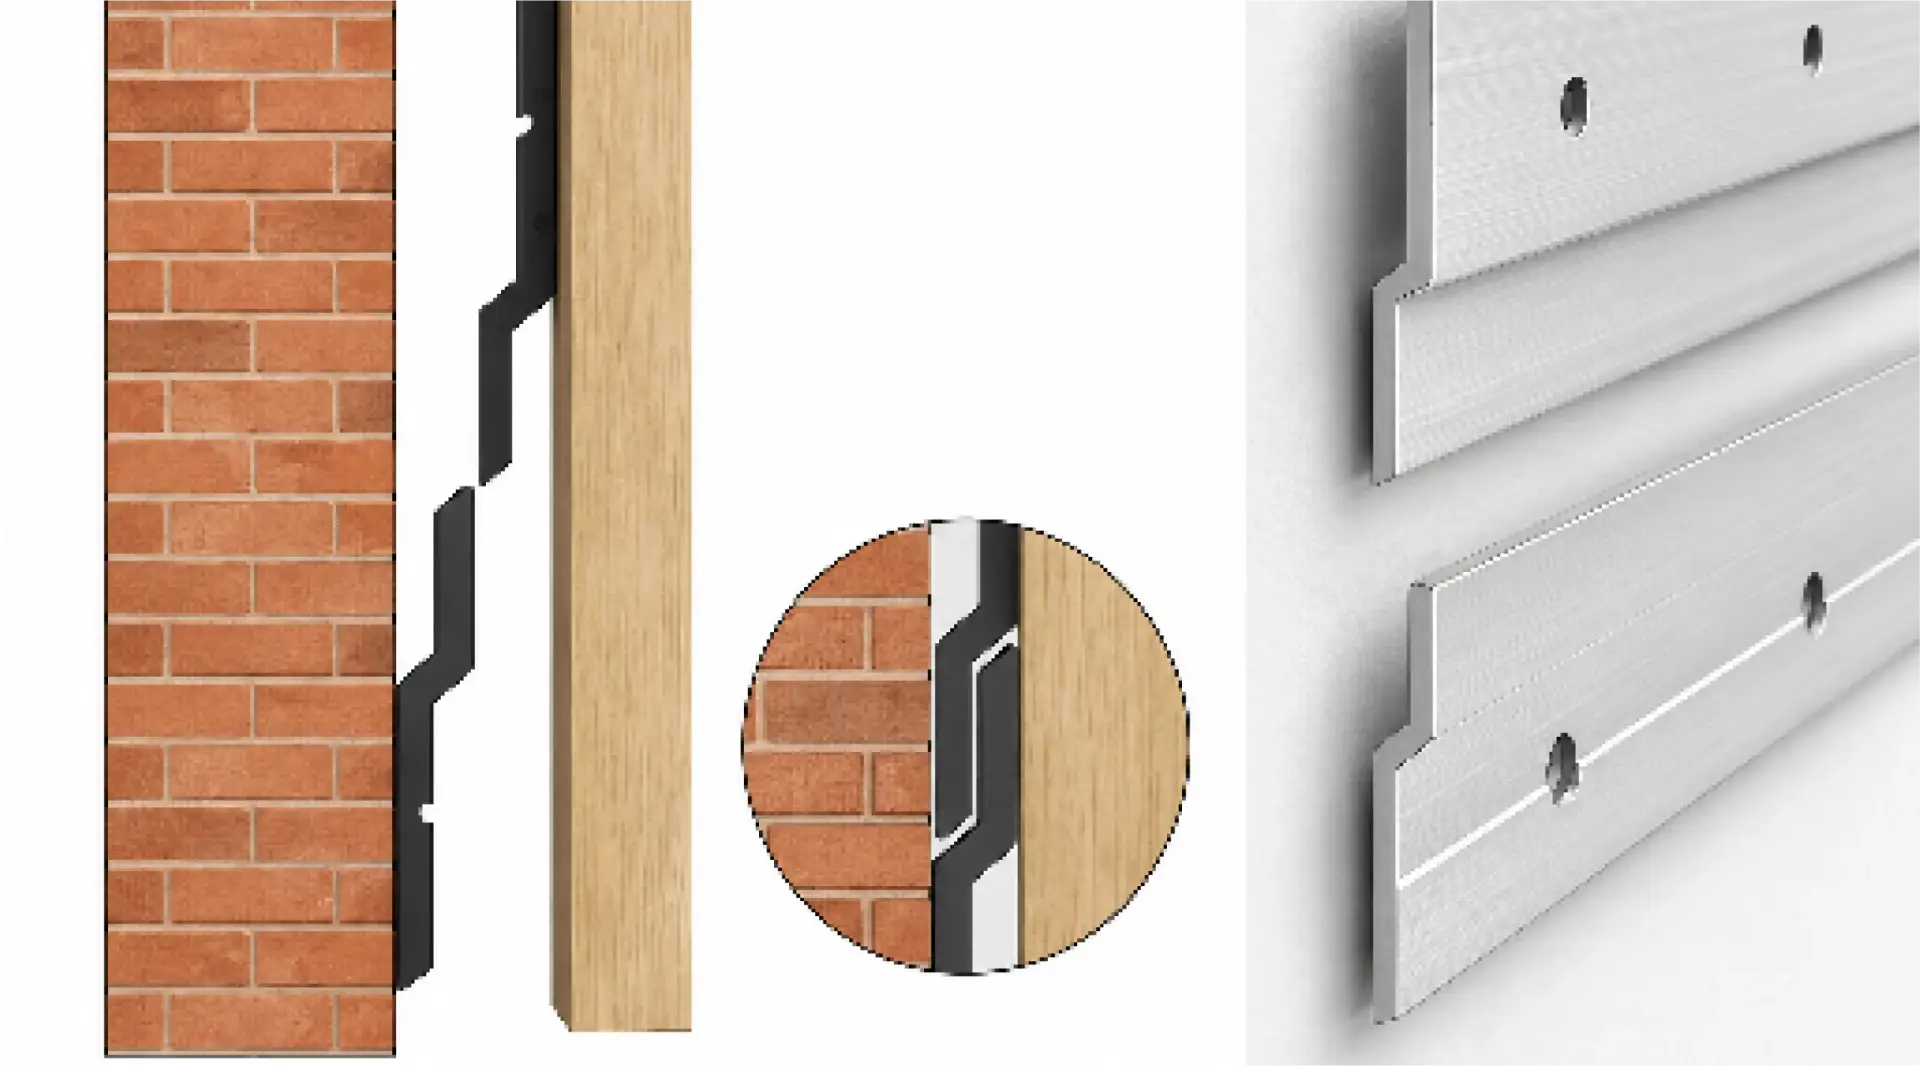
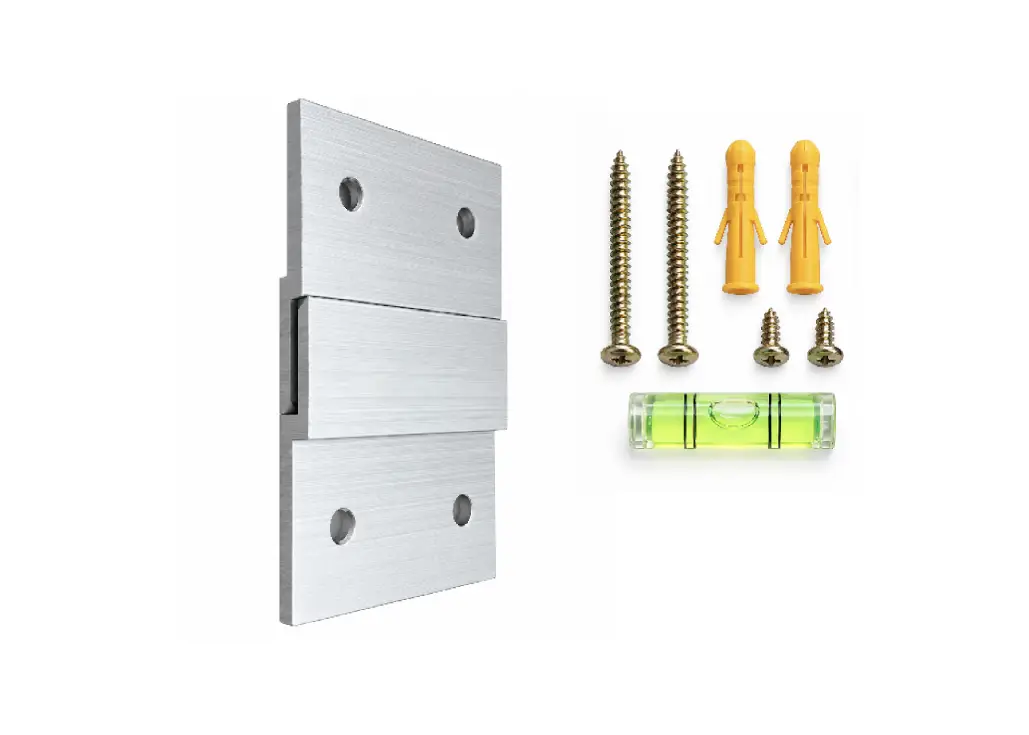
The catalog calls this Hook & Wall Nail. Two aluminum-alloy brackets connect the frame and wall: the frame-side bracket engages with its wall-side counterpart.
The illustrated kit contains brackets A and B, two short screws, two wall screws, two wall plugs and a level. The frame bracket sits at the upper center; the wall bracket follows the corresponding centerline.
Check frame screw retention, wall-fixing suitability and full engagement. The illustrated plugs are not suitable for every wall by default. Assess whether additional measures are needed to limit movement during scratching.
Option 02: Concealed keyhole plates
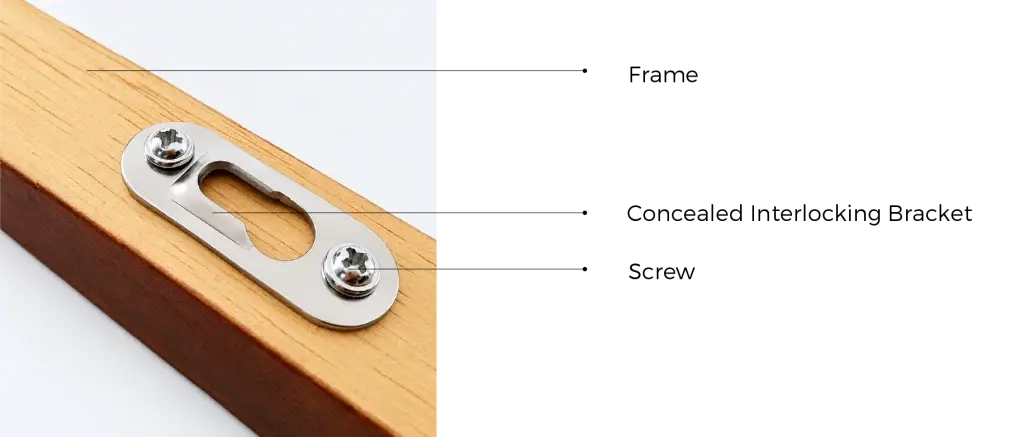
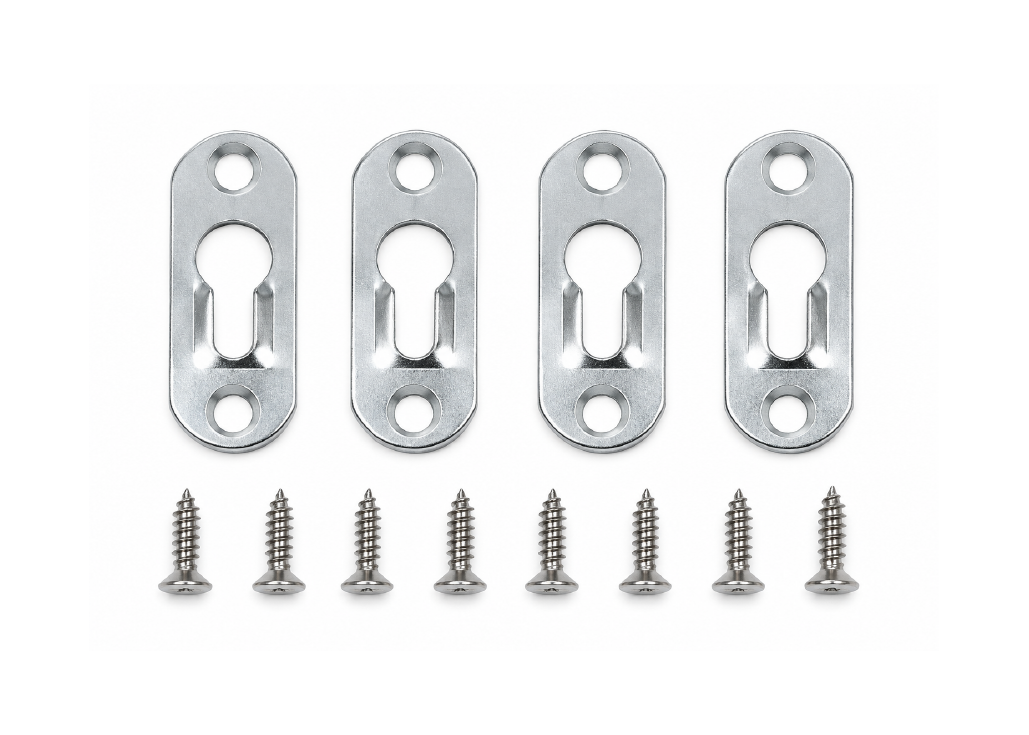
Named Concealed Interlocking Bracket in the catalog, this illustrated iron hardware uses keyhole slots. Two plates sit at the upper corners, with two frame screws per plate and two corresponding wall fixing points.
Lowering the frame locates the wall screw heads into the slots. Confirm spacing, level alignment, screw-head dimensions and rear clearance.
Test the assembly against pulling, sideways movement and unintended lifting on the selected wall. Concealed appearance does not establish resistance to these forces.
Review the rear construction with the hardware fitted. Confirm that plates sit correctly, fasteners remain accessible where needed and installation instructions explain the engagement. Approval should cover the complete arrangement, rather than the plate viewed in isolation.
Option 03: Picture-hanging strips
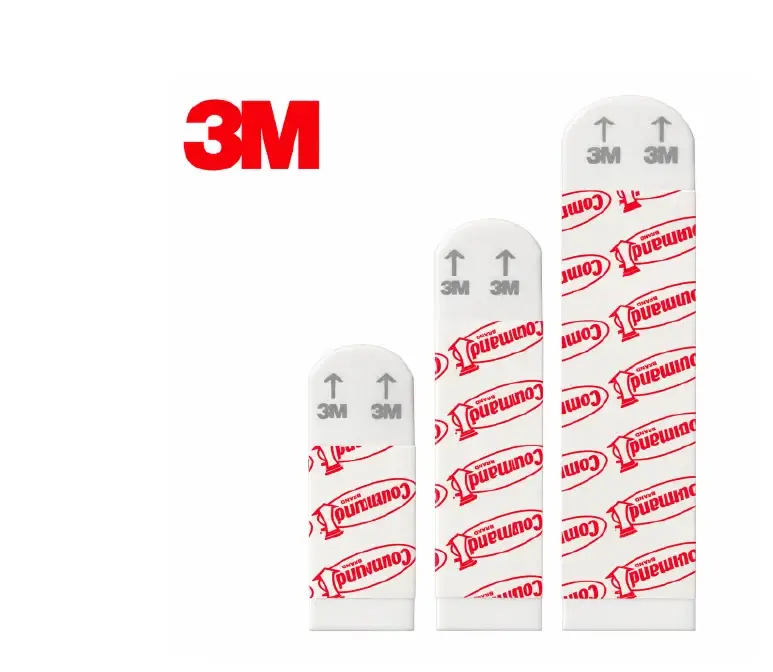
The catalog includes 3M Command strips as a drill-free concept. Check the exact product’s regional instructions and suitability for the finished assembly and intended use.
Command guidance excludes textured walls, wallpaper, brick, rough or non-stick surfaces and fabrics, and warns against paper or soft frame surfaces. Do not attach strips directly to loose sisal textile or assume paper backing is approved.
Follow manufacturer requirements for preparation, pressing, waiting, strip quantity and removal. Static picture-weight ratings do not establish suitability for repeated scratching forces or every rental home.
Manufacturer references: application and removal and the exact product’s surface guidance.
What changes for an unframed sisal mat?
Distinguish mat retention from wall attachment. The catalog’s three mounting concepts relate to a frame or suitable rigid rear surface, not a specified direct-to-wall system for loose mats.
For an unframed format, discuss purpose-designed backing or edge retention with TerraFaser. Verify mat-to-support and support-to-wall connections separately. Define whether the mat is fixed or replaceable: removing the frame and replacing the scratching surface require different instructions.
Prepare a complete installation brief
- Identify wall types, finishes and permission to drill.
- Confirm product weight, dimensions, rear construction and scratching position.
- Specify mounting hardware or the exact adhesive product, plus mat retention.
- Agree installation, inspection, removal and replacement instructions.
- Review a complete sample and evidence for the intended use.
Share your product format and target market with TerraFaser to discuss suitable catalog options and any further development needed.
Connected ideas for your range.

TAKE THE NEXT STEP
Bring the questions into your next brief.
Discuss your range → felix@terrafasercat.com